How to get a Canadian eSIM for your iPhone
If you’re traveling to Canada and want to stay connected, you may be wondering how to get a Canadian eSIM for your iPhone. Although not all carriers support eSIMs, there are a few that do, and it’s a relatively simple process to get one. In this article, we’ll show you how to get a Canadian eSIM for your iPhone so you can stay connected while you’re in the Great White North.
How to get a Canadian eSIM
There are a few things you need in order to get a Canadian eSIM:
1. A compatible device. At the moment, eSIMs only work with the latest iPhones (iPhone XS, XS Max, and XR) and the Google Pixel 3.
2. A Canadian carrier that supports eSIMs. Currently, only a few carriers in Canada offer eSIMs, including Bell, Telus, Rogers, and Freedom Mobile.
3. An eSIM plan from one of the aforementioned carriers. These plans are similar to regular plans, except they’re delivered to your device electronically.
Here’s a step-by-step guide on how to get an eSIM in Canada:
1. Make sure you have a compatible device and that your carrier offers eSIM plans.
2. Contact your carrier and let them know you’d like to sign up for an eSIM plan.
3. The carrier will then send you a QR code or SIM number, which you’ll need to input into your device.
4. Once the code is inputted, your device will automatically connect to the carrier’s network and you’ll be able to start using your eSIM plan!
eSIM for iPhone in Canada
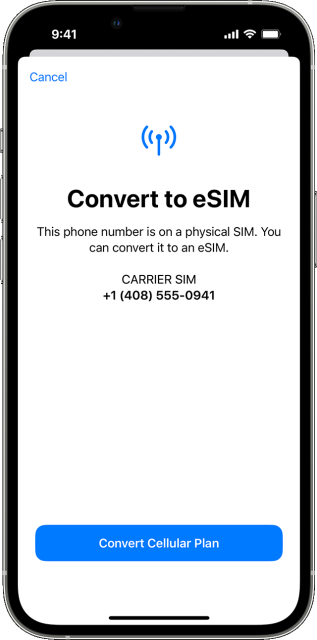
An eSIM is a digital SIM that allows you to activate a cellular plan from your carrier without having to use a physical nano-SIM. The eSIM on your iPhone can be used for cellular data and to make and receive phone calls and texts.
In Canada, eSIMs are currently supported by Bell, Rogers, and Telus. If you’re on a carrier that doesn’t support eSIMs, you can still use a physical nano-SIM.
How to use eSIM on iPhone in Canada
ESIM is a new type of SIM card that allows you to activate a cellular plan from your carrier without having to use a physical nano-SIM. This means that you can now have two active plans on your iPhone – one on eSIM and one on a physical SIM.
In order to use eSIM, you will need an iPhone that supports it (iPhone XS, iPhone XS Max, or iPhone XR) and a carrier that offers eSIM plans. In Canada, the carriers that currently offer eSIM plans are Bell, Telus, and Rogers.
If you want to activate an eSIM plan, you will need to go to your carrier’s website and follow their instructions. Once you have activated your eSIM, you can add it to your iPhone by going to Settings > Cellular > Add Cellular Plan.
Activate eSIM on iPhone in Canada
To turn on your iPhone’s eSIM, go to Settings > Cellular > Add Cellular Plan. If you don’t see Add Cellular Plan, contact your carrier.
Your carrier might offer multiple plans for you to choose from. If so, tap the plan that you want to use. If you’re asked to choose a carrier, tap the one that you want to use.
If you’re asked for a confirmation code, contact your carrier.
Get eSIM for iPhone in Canada
An eSIM is a digital SIM that allows you to activate a cellular plan from your carrier without having to use a physical SIM card. This means that you can use one device for both your personal and business lines, or easily switch between multiple plans.
In Canada, eSIMs are currently only available for the iPhone XS, iPhone XS Max, and iPhone XR. To get started, you’ll need to make sure that your iPhone is running iOS 12.1 or later, and that you have a carrier that supports eSIMs (such as Bell, Rogers, or Telus).
Once you’ve verified that your iPhone and carrier are compatible, you can add an eSIM to your device by following these steps:
1. Open the Settings app on your iPhone.
2. Tap Cellular.
3. Tap Add Cellular Plan.
4. Use your iPhone camera to scan the QR code provided by your carrier.
5. Follow the prompts to activate your plan.
And that’s it! You can now use your iPhone with an eSIM in Canada.
eSIM activation on iPhone in Canada
ESIM activation on iPhone in Canada is a new and convenient way to have a cellular plan. There is no need for a physical SIM card, and you can easily switch between plans without having to go through your carrier. To activate eSIM on your iPhone, simply go to the Settings app, then Cellular, and then Add Data Plan. From there, you will be able to select your carrier and plan. You may need to enter a code from your carrier to complete the activation. Once you have activated eSIM, you can manage your plans and add new ones by going to the Settings app, then Cellular, and then Data Plans.
How to set up eSIM on iPhone in Canada
To set up eSIM on your iPhone in Canada, you will need an iPhone that is compatible with eSIM, a carrier that supports eSIM, and a valid SIM card.
1. First, check to see if your iPhone is compatible with eSIM. eSIM is available on the iPhone XS, iPhone XS Max, and iPhone XR.
2. Next, contact your carrier to see if they support eSIM. Not all carriers in Canada support eSIM at this time.
3. Once you have confirmed that both your iPhone and carrier support eSIM, you will need to obtain a valid SIM card. This can be done by contacting your carrier or by purchasing a SIM card from a third-party retailer.
4. Once you have obtained a valid SIM card, open the Settings app on your iPhone and navigate to the Cellular menu.
5. Tap on the Add Cellular Plan option, then use your iPhone’s camera to scan the QR code on the SIM card.
6. If prompted, enter the activation code for your SIM card. Once the process is complete, you will see your new eSIM plan listed under the Cellular Plans menu.
eSIM setup on iPhone in Canada
Setting up an eSIM on your iPhone in Canada is easy. Just follow these simple steps:
1. Open the Settings app on your iPhone.
2. Tap on Cellular.
3. Tap on Add Cellular Plan.
4. Select your carrier from the list.
5. Follow the instructions on the screen to set up your eSIM.
That’s it! You’re now ready to use your eSIM on your iPhone in Canada.

